Wednesday, August 26, 2009

County Fair with good friends and GREAT FOOD!

Once a year, the hubs and I get together with my good friend and her family at the county fair.  It is always a blast.  We mainly go to eat ourselves sick to laugh and have a great time together.  Our county fair is seriously THE BEST FAIR!  I know that is saying a lot, but it really is.  And yes, the food is really freaking good!  Every year we are happy to see the vendors we love so much come back.  We sadly have our regular "must-eat-this-while-at-the-fair-and-from-this-certian-vendor" places....everything from corndogs to dessert we have found the best! 
My friend, Shaunda, and I had to take this picture in front of this booth for old times sake.  I have to share a story with all of you regarding this picture.  You see, Shaunda took me to the fair in her hometown several years ago.  All I had heard about was how I had to eat what was called "The Frito Bandito" (yes this is as bad as it sounds!).  It is basically a taco in a bag...a bag of Frito's that is!  After it was explained to me, sadly, it sounded kinda good and I got excited about tasting this food that was so treasured by my friend and her family. 
So sure enough we get to the fair, I pull out my cash and pay for this lovely "Frito Bandito".  First bite in, good.  Second bite....GREAT...it seemed to get better and better with every bite!  Seriously!  I could honestly see why they were raving about this.  And then before I knew it my bag was empty and my stomach was starting to churn! 
Of course we then had to ride the rides!  Well, not such a great idea for myself...especially after eating this Frito Bandito.  Needless to say, the Frito Bandito didn't stay in my stomach too long, which was probably a good thing.  It went down the side of some twirly, windy, spinning, whirl wind of a ride!  YUCK!  What an experience it was...one that will never be forgotten!  And for the record...I will NEVER eat another "taco in a bag" no matter what you call it!  haha
There were certianly plenty of other options to eat, and boy did we eat!  The hubs and I like to at least split things so we can try a bite of everything but not eat so much!  So we had ... drum roll please:
A cheeseburger
A footlong corndog (which by the way is NOT a footlong, how disappointing!  It was two regular 
                                  hot dogs on a stick!)
Cheesecake (two kinds - carrot cake and turtle sundae) THE BEST CHEESECAKE ON THE
                        PLANET
Corn on the Cob
Italian Sausage with the works of course
Sweet Tea (this is the best part...you buy a cup at $3.50 and then you get refills for $1!  We
                     spent $9 on tea...you do the math!  lol)
And my favorite part - the french fries...................
Every year I go searching for my french fry booth.  (last year I waited an hour for these fries!)  It is actually a little asian family, but the only vendor in the WHOLE fair that does fresh cut french fries.  This means not from the bag frozen, the whole potato cut and then put in the fryer!  The only way to eat a fair fry in my opinion!  Of course you have to top it with cheese and jalepenos too!  They are soo yummy and so fresh!
I really have no explainatin for this photo...apparently it's the "new" way to get your ketchup and mustard!  I however, am just going to plead the fifth on this one! 
Of course we do take breaks in between all the eating...we watch barrel racing, mule shows, go through all the exhibits (food, fruit and veggies, chickens, photography, etc.).  We got a kick out of the boys watching the barrel racing...standing the same way, moving their heads in time!  They didn't even know I took this picture! 
We always end our evening watching the tractor pulls...
And with that I leave you with one last image....
This was my view watching the tractor pulls...you see it all at the fair!  We were guessing that they were trying to save some money by sharing jeans...as for the mullet, well I have no comment other than welcome to Tennessee my friends!  :o)
I am now off to burn some much needed calories! 

Tuesday, August 25, 2009

Mexican Casserole

I had to promise myself that I would post something "savory" before I post yet ANOTHER sweet treat!! :o) No worries though, I still have many more to come! I am excited to share this recipe with you all because it wasn't actually one I made! I have to admit, the hubs did 100% of the work on this meal! And let me tell you what, IT WAS FANTASTIC!


With the hubs being a school teacher and having the entire summer off I often gave him a hard time about having so much free time on his hands. I would pile up the "honey-do" lists and come home to find it all completed! Maybe I wasn't giving him enough to do :o) **Note to self: make lists longer next year! :o)** One thing about having him around in the summer is that my house is always clean and he usually has dinner on the table ready to eat when I get home! I finally mentioned that it would be nice if he would try to come up with a "nicer" meal...something that wasn't a meat on the grill and a steamfresh bag of veggies! Not that I have a problem with that, I just wanted to see what he would come up with! I can only eat some much grilled chicken and steamed peas!!! :o)

I couldn't believe it when I came home, opened the door, and this great aroma (not the smell of the grill being lit) hit me in the face! I immediately asked what was for dinner. "Mexican Casserole" was the response, and I was so excited to taste his hard labored meal!


Let me tell you it was wonderful! Leftovers were even better! The hubs gets an "8" hehe... (you would think this was funny if you had read this post!) ok maybe not an 8 probably higher, it was that good!
Mexican Lasagna


1-1/2 pounds ground beef
1 envelope taco seasoning
3/4 cup water
1 can (16 ounces) refried beans
1/2 cup salsa
6 flour tortillas (6 inches)
2 cups frozen corn, thawed
2 cups (8 ounces) shredded cheddar cheese
Shredded lettuce, chopped tomatoes, sliced ripe olives and sour cream, optional


In a large skillet, cook beef over medium heat until no longer pink; drain. Stir in taco seasoning and water. Bring to a boil. Reduce heat; simmer, uncovered, for 5 minutes.
Meanwhile, in a microwave-safe bowl, combine beans and salsa. Cover and microwave for 1-2 minutes or until spreadable.
Place three tortillas in a greased round 2-1/2-qt. baking dish. Layer with half of the beef, bean mixture, corn and cheese; repeat layers.
Bake, uncovered, at 350° for 40-45 minutes or until cheese is melted. Let stand for 5 minutes. Serve with lettuce, tomatoes, olives and sour cream if desired.

Sunday, August 23, 2009

Chocolate Cupcake with Swiss Meringue Buttercream

This is one of the best recipes I have tasted for a chocolate cupcake! Go figure the recipe came from Martha Stewart! :o) I had been wanting Martha's Cupcake Cookbook for some time (really since it hit store shelves!) but couldn't seem to justify spending money on another cookbook. I don't really buy myself stuff, especially cooking stuff, I always seem to have a "wish list" full of things I want/desire. I guess I just feel like it is crazy to continue buying myself stuff when we need things like groceries, gas...a roof over our heads! :o) All things that take precedence over my silly baking hobby!

So I just sulked about it for months...watching everyone else blog about Martha cupcake goodness...yes I had cupcake envy! Then one day I came home from work to find that the hubs had a surprise on the table waiting for me! It was indeed Martha's cupcake book, and actually sitting right next to it was Hello Cupcake! (yet another book I was wanting)!! What a great guy he is!

But back to these wonderful cupcakes...
So a co-worker had a "special" birthday coming up. The big "4"-"0"! I knew I wanted to make him something special, I just wasn't sure what to do. I kept going back and forth, cake - cupcake - cake - cupcake, I finally decided I wanted to do cupcakes so I could try out another Martha recipe.

I emailed my co-worker's girlfriend to find out his flavor of choice. Turns out it was chocolate! I am actually not a huge fan of chocolate, nor am I really supposed to eat much of it, but I flipped through the book anyways and came across a chocolate cupcake recipe that looked pretty tasty. It was topped with a Swiss Meringue Buttercream, which I thought would be a great combination.

Sure enough it was a FABULOUS combination and I am so glad I made them. The cupcakes were so incredibly moist and flavorful. I actually think this recipe would make a great cake. The buttercream was so smooth and creamy; it went perfectly atop the chocolate.

Chocolate Cupcakes with Swiss Meringue Buttercream
(from Martha Stewart Cupcakes, cupcakes - page 152 / buttercream - page 304)
For the cupcakes:
1 1/2 cups all purpose flour
3/4 cup unsweetened dutch-process cocoa powder
1 1/2 cups sugar
1 1/2 teaspoons baking soda
3/4 teaspoon baking powder
3/4 teaspoon salt
2 large eggs
3/4 cup buttermilk (see my tip for homemade buttermilk here)
3 Tablespoons vegetable oil (I used canola)
1 teaspoon pure vanilla extract
3/4 cup warm water
For the buttercream:
5 large egg whites
1 cup plus 2 Tablespoons sugar
pinch of salt
1 pound (4 sticks) unsalted butter, cut into Tablespoons, brought to room temperature
1 1/2 teaspoons pure vanilla extract
For the cupcakes:
Preheat oven to 350 degrees.
Line standard muffin tins with paper liners. With an electric mixer on medium speed, whisk together flour, cocoa, sugar, baking soda, baking powder and salt. Reduce speed to low. Add eggs, buttermilk, oil, extract and the warm water. Beat until smooth and combined, scraping down sides of bowl as needed. (Batter will be thin.)
Divide batter evenly among the lined cups, filling each about two-thirds full. Bake, rotating tins halfway through, until a toothpick inserted in centers comes out clean, about 20 minutes. Transfer to a wire rack to cool, about 10 minutes. Turn out cupcakes onto racks and let cool completely.
Cupcakes can be stored overnight at room temperature, or frozen up to 2 months in an air tight container.
For the buttercream:
Combine egg whites, sugar, and salt in the heatproof bowl of a standing mixer set over a pan of simmering water. Whisk constantly by hand until mixture is warm to the touch and sugar has dissolved (the mixture should feel completely smooth when rubbed between your fingertips).
Attach the bowl to the mixer fitted with the whisk attachment. Starting on low and gradually increasing to medium-high speed, whisk until stiff (but not dry) peaks form. Continue mixing until the mixture is fluffy and glossy, and completely cool (test by touching the bottom of the bowl), about 10 minutes.
With mixer on medium-low speed, add the butter a few tablespoons at a time, mixing well after each addition. Once all butter has been added, whisk in vanilla. Switch to the paddle attachment, and continue beating on low speed until all air bubbles are eliminated, about 2 minutes. Scrape down sides of bowl with a flexible spatula, and continue beating until the frosting is completely smooth. Keep buttercream at room temperature if using the same day, or transfer to an airtight container and refrigerate up to 3 days or freeze up to 1 month. Before using, bring to room temperature and beat with paddle attachment on low speed until smooth again, about 5 minutes.
NOTE: Don't worry if the mixture appears to separate or "curdle" after you've added the butter. Simply continue beating it on medium-high speed, and it will become smooth again...PROMISE!!!
(Optional) To tint buttercream (or royal icing), reserve some for toning down the color, if necessary. Add gel-paste food color, a drop at a time (or use the toothpick or skewer to add food color a dab at a time) to the remaining buttercream. You can use a single shade of food color or experiment by mixing two or more. Blend after each addition with the mixer (use a paddle attachment) or a flexible spatula, until desired shade is achieved. Avoid adding too much food color too soon, as the hue will intensify with continued stirring; if necessary, you can tone down the shade by mixing in some reserved untinted buttercream.
To finish cupcakes:
Fill a pastry bag fitted with a medium french star tip (Ateco #863 or Wilton #363) with buttercream. (I used my Pampered Chef Easy Accent Decorator) Pipe buttercream on cupcake as desired. Cupcakes can then be stored up to 1 day at room temperature, or refrigerated up to 3 days in air tight containers. Bring to room temperature to serve.
Time to make a wish ................. make it a good one ........

Happy Birthday ya "OLD FART" :o)


Friday, August 21, 2009

Iced Oatmeal Applesauce Cookies

I hope you enjoyed my Parisian themed dinner! It was so delicious! I can hardly wait to make it again!

Of course here I am, sharing ANOTHER dessert with you! I guess I just have sweets on the brain lately! :o) Back on my birthday, my good friend Kristen (the one who takes all those great photos on my blog!) surprised me with Martha Stewart's Cookie Cookbook for my birthday! What a great friend!!! :o) I knew I had to thank her by making her cookies of course! So I looked through the cookbook to find something that I knew she would like...that is when I came across the Iced Oatmeal Applesauce Cookies! Although I am sure she would have loved any of the other cookies I bookmarked, there was just something about these cookies that had her name written all over them!

Kristen grew up on a farm in upstate New York. It was actually an apple farm. She has great stories about being on the farm growing up. She always talks about the homemade applesauce her mom would make and how tasty it was. (She recently even tried her hand at making homemade applesauce and did a great job!!!) So I thought these cookies would put a smile on her face, and maybe even bring back some good ol' apple memories!

These cookies turned out AMAZING! Not that I really expected anything less than amazing out of Miss Martha Stewart, the girl seriously has some great recipes. I actually have yet to come across one I did not like!! These cookies were so moist and not too sweet. I loved how the maple icing added just the right amount of sweetness to every bite.

I also made these cookies to take to a birthday get together of a friend of mine to just turned 40! (which by the way...you must see the dessert I made him for his actual birthday, it involves Martha again! I think that will be my next post!) The cookies were a huge hit there. I will definitely be making these again soon!

Iced Oatmeal Applesauce Cookies
(from Martha Stewart Cookies, page 77)
For the cookies:
4 Tablespoons (1/2 stick) unsalted butter, melted
1 cup packed light brown sugar
1/2 granulated sugar
1 large egg
1/2 cup applesauce
1 1/2 cup old-fashioned rolled oats
1 1/4 cups all purpose flour
1/2 teaspoon baking soda
1/4 teaspoon baking powder
1/4 teaspoon salt
1 cup raisins ** (see below for tip)
For the icing:
1 3/4 cups confectioners' sugar
3 Tablespoons pure maple syrup
3 Tablespoons water (I didn't add the whole 3 Tablespoons, just add slowly to get the right consistency)
Preheat oven to 350 degrees.
Make cookies:
Put butter and sugars in the bowl of an electric mixer fitted with the paddle attachment. Mix on low speed until combined. Add egg and applesauce; mix until well blended, 2 to 3 minutes. Mix in oats, flour, baking soda, baking powder and salt. Mix in raisins.
Using a 1 1/2 inch ice cream scoop, drop dough onto baking sheets lined with parchment paper, spacing 2 inches apart. Bake cookies until golden and just set, 13 to 15 minutes, rotating pans halfway through baking. Let cool on sheets 5 minutes. Transfer cookies to a wire rack set over parchment paper; let cool completely.
Make icing:
Whisk confectioners' sugar, maple syrup, and water until smooth. Drizzle over cookies; let set. Cookies can be stored in single layers in airtight containers at room temperature for up to 3 days.
Makes about 2 1/2 dozen.
** I want to share a great little tip with you on how to plump up old raisins you may have in your cabinets. It is a great tip to have handy. Don't think those dried up little raisins aren't any good, they just need a little TLC!! :o) All you need to do is place the measured amount of raisins in a deep bowl and cover them with warm water. Let them sit for about 5 to 10 minutes. Drain off the water and pat dry with paper towels...and there you have it just like new! Fresh, plump, moist raisins ready to go into your recipe! **

Wednesday, August 19, 2009

Parisian Dinner Part 2: Applesauce Granita with Maple Yogurt

This is the second installment of my budget friendly Parisian dinner, thanks to the most recent episode of $10 Dinners. The first course was the delicious Potato-Bacon Torte. The torte turned out absolutely wonderful, so naturally I was so excited to get to dessert!

SIDE NOTE: I wanted to mention that Melissa d'Arabian also featured a Cafe Green Salad to go along with the torte in her Perfectly-Priced Parisian show. While the salad sounded wonderful, I sorta had the feeling that the torte would be enough for us. I talked about making the salad up until the last few minutes before eating the meal, but we all decided that the carbs would probably fill us up! So we skipped the salad, and ended up each eating almost 2 pieces of the torte! So maybe the salad would have been a good idea! It would have stopped us from eating seconds, (ok, maybe not!) but it would have given us something healthy and allowed us to get a serving of veggies in!

So with our bellies full of Potato-Bacon Torte, we decided to pull out the Granita and give it a try. . .

This Granita was amazing! It was so refreshing and light, and the yogurt sauce really took the dessert to an whole new level. It was icy and not to sweet. We couldn't decide if the "unsweetened" applesauce was a good or bad idea, but in the end it was a great idea. The maple yogurt sauce gave the Granita its sweetness and it really didn't need anymore. The hubs was eating his and at one point said "is there anymore sauce, I'm out!"! The yogurt sauce was delicious and I think it would be good on a lot of other things...

Applesauce Granita with Maple Yogurt
For the Granita:
2 cups unsweetened applesauce
1 teaspoon lemon juice
For the Maple Yogurt Sauce:
1/2 cup plain regular fat free yogurt (not Greek-style)
1 tablespoon good quality maple syrup (I am pretty sure it was maybe 2 Tablespoons...just give it a good squirt!)
1/2 teaspoon cinnamon

For the Granita:
In a shallow 8-inch square pan, stir the applesauce and lemon juice together and spread the mixture evenly in the pan. Place the pan in the freezer for at least 1 hour.

For the Sauce:
In a bowl, combine the yogurt, maple syrup, and cinnamon. Chill the sauce until ready to serve.

Remove the granita from the freezer. With a fork, scrape the surface of the granita to gently fluff it up. Serve immediately, in dessert glasses or dishes, drizzled with yogurt sauce.
Parisian Diner
Stay tuned for another great dessert!
**Photography courtesy of Kristen Wiltse Photography**

Tuesday, August 18, 2009

Potato-Bacon Torte ... A Parisian Dinner

I can't believe this is my 100th post! I am so excited to bring you these next few posts (I have some GREAT stuff coming)! As a tribute to my 100th post, I am going to share with you a delicious Parisian themed dinner!

I got the idea from watching The Next Food Network Star. The winner, Melissa d'Arabian, had her premiere show last weekend where she featured a "budget-friendly" Parisian-style dinner. Her show is called $10 Dollar Dinners, so it was her take on Parisian flavors, without all the cost...my kinda meal!!! I was drooling while I sat and watched the entire show...I knew I had to make this meal soon!

I have always enjoyed preparing meals for friends and family, and I figured this would be a great meal to entertain with. (I also have a close friend who is pregnant and having a hard time. I thought this would be a good dish to take her to help her feel better! But I will have to make another :o) I had to do a trial run to make sure it tasted good!) It passed with flying colors!

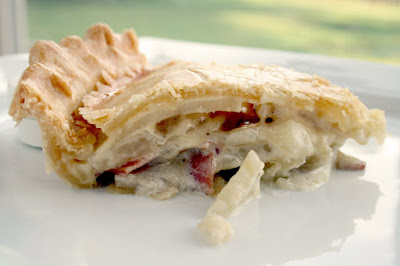
This torte was by far one of the best I have ever tasted! It was so creamy, and every bite packed a great amount of flavor. I didn't taste the thyme as much as I would have liked, so next time (that's cute get it thyme, time hehe) I think I will add even more sprigs to the cream. I may also sprinkle some inside the torte. I loved the bacon in it too. It added a great crunch and a nice saltiness. I used thick-cut bacon, which I think was a much better choice. Peppered bacon might also be good.

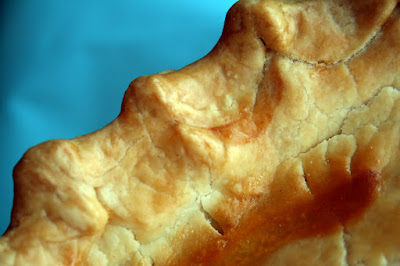
I must also mention that I didn't make the homemade crust...sadly I didn't have enough time, since I was preparing so many other things. So I took the short cut and bought the Pillsbury pre-made pie crust. The hubs looked at me in the store and said, "WHAT?!? You aren't really going to buy that are you? That stuff is gross!" I swear he said he wasn't going to eat it if I didn't make the crust from scratch, but he says otherwise! In the cart it went, and I promised him he wouldn't be disappointed! And...at the dinner table all he kept talking about was how good it was, and how flaky and tasty the crust was! Go figure! :o)


I love this next photo!
Potato-Bacon Torte
(adapted from Melissa d'Arabian)

6 strips of thick cut bacon
6 sprigs fresh thyme
2/3 cup heavy cream
2 Pie Crusts, recipe follows (I actually bought the Pillsbury pre-made/ready to go pie crust)
3-4 medium potatoes, peeled
Salt and freshly cracked black pepper (I used my garlic pepper and garlic salt grinders)
1/4 cup grated Gruyere cheese (Gruyere was a little too expensive for me so I substituted with a nice baby swiss ... it has a similar flavor and was just as tasty!)
1 egg yolk, whisked with a splash of water
Directions:
Preheat the oven to 375 degrees F.

In a skillet over medium heat, cook the bacon until just crispy. Drain on paper towel lined plate and set aside. Crumble the bacon when cool to the touch.

Meanwhile, in a small saucepan, heat the thyme and cream over low heat to a bare simmer. Turn off the heat and let steep for about 5 minutes. Remove the thyme sprigs.

Remove the pie pan from the refrigerator. Slice the potatoes in half lengthwise and then finely slice the potatoes. Working in circles, arrange the potato slices in the pie crust, stopping to season each layer with salt, pepper, and about 1/4 of the crumbled bacon. Continue layering until the pie pan is nearly full. Top with an even layer of the cheese and gently pour cream around and over the entire pie, allowing it to seep down between the potato slices. (You may not use all the cream, but I did!)

Roll out the remaining disk of refrigerated dough. Cover the pie with the dough and crimp the edges closed. Brush the top and edges of the crust with egg wash. Make a few slits in the center of the top crust, for the steam to escape, and put the pie pan on a baking sheet. Bake the torte until the crust is browned and crispy and the potatoes are cooked through, about 50 to 60 minutes. If the crust edges get too brown, cover them with some strips of aluminum foil. Remove the pie from the oven and let rest at least 15 minutes before cutting into wedges and serving.

Pie Crust:
1 cup butter (2 sticks), cubed and chilled
2 1/4 cups all-purpose flour
1 teaspoon salt
8 to 10 tablespoons ice water

Put the butter, flour, and salt in the food processor, and pulse lightly just until the mixture resembles wet sand. Add the water, 1 tablespoon at a time, pulsing briefly after each spoonful of water. Keep adding water until the dough just begins to gather into larger clumps. Transfer equal amounts of the dough into 2 resealable plastic bags and pat each into a disk. Let rest in the refrigerator for at least 30 minutes. Remove 1 of the disks from the bag to a flour coated surface. Using a rolling pin, roll the dough out to a 10-inch round. Gently fit the rolled dough into a 9-inch pie pan, and refrigerate while you prepare the torte ingredients.
(Yields 2 (9-inch) pie crusts)
I hope you will give this a try, it was so easy and sooo yummy. I can't wait to share the rest of my Parisian meal with you!
Stay tuned for part two of my Parisian Dinner :o)
Thanks to Kristen Wiltse Photography for making my next several dishes look mind blowingly delicious! Check out her blog here.

Sunday, August 16, 2009

Rootbeer Float Cupcake - A Gigi's Cupcake Review

Down here in Nashville, specialty cupcakes are becoming all the rage! All sorts of places are popping up:


If you know of any others let me know...

This particular post is dedicated to Gigi's Cucpakes! I love their cupcakes, mainly because of the mound of frosting they put on each of their hand-made-with-love cupcakes! It is good stuff let me tell you! It opened a while ago (maybe a couple of years ago) and I immediately fell in love :o) Gigi's has a menu posted on their website, that changes daily. They didn't start out with as many flavors as they have today, but the flavors just keep growing. Everything from Carrot Cake, Midnight Magic Chocolate Chip, Miss Princess, Orange Dreamsicle, Peanut Butter Cup, Strawberry Short Cake, Texas Milk Chocolate, Wedding Cake, Tiramisu, White Midnight Magic Chocolate Chip, Bailey's Irish Cream, Coconut Snowball, Lemon Dream Supreme, Hunka Chunka Banana Love, Scarlett's Velvet, Pink Lemonade....the list goes on and on! Which bring me to ... DRUM ROLL PLEASE .......

The Suspect: The Rootbeer Float Cupcake

Root beer flavored yellow cake,
with root beer flavored butter cream frosting,
drizzled with marshmallow cream
and topped with straw and gummie cola bottle.


HELLO ROOTBEER LOVERS!! (Myself included) Out of all the flavors they have featured, I was most excited to see this one! First of all look how cute!!! (ok my pictures suck below, but it was so cute in person!) Secondly, WHAT A GREAT IDEA for a flavor! And let me tell you, this cupcake was amazing...one of the best ones I have had in a long time...that is when it comes to specialty cupcakes outside of New York City's CRUMBS! (If you go to NYC be sure and check CRUMBS out!) I couldn't believe how much it DID actually taste like a Rootbeer Float! Man I want another one right now! :o)

I actually got two of these one cupcake for the recent birthday girl ... the one I made the Spaghetti and Meatball Cupcakes for! She is a Rootbeer lover like myself, so I knew she would appreciate it, and she did!

So if you are every in Nashville, be sure and check Gigi's out...it will not disappoint!

**disclaimer - you may want to bring a friend (or an appetite) as the cupcake is enough to share with someone...but only one more!**

Saturday, August 15, 2009

Starbucks Banana (minus the walnuts) Bread

The hubs and I really love Banana Bread, so when my mother-in-law was visiting a couple of weekends ago and brought a recipe card from Starbucks featuring their Banana Walnut Bread, we got so excited! The hubs L-O-V-E-S Starbucks and all their pastries, so any recipe we can get our hands on gets him all giddy!


Unfortunately, the hubs doesn't like any kind of nut what-so-ever in his bread...NONE! He says it is a texture thing for him and therefore he won't even try it. So I attempt to stay away from all recipes that call for nuts, or I at least omit them when I can. I wish I would have spilt this batter and made one with walnuts just to see what it would have been like. Maybe next time, as I am sure I would have loved it!


This Banana Bread recipe was very tasty and VERY moist! I can't really recall a time that I was at Starbucks and saw their Banana Bread, but maybe I just don't go enough! So I don't have anything to compare it to, but I can tell you that it was delicious and you should give it a try! If you have had Starbucks version, maybe you can tell me how close in flavor it really is!


Starbucks Banana (minus the walnuts) Bread
(courtesy of Starbucks)

2 cups flour
1 teaspoon baking soda
1/4 teaspoon salt
1 egg
1 1/8 cup sugar
1/2 cup vegetable oil
2 tablespoons buttermilk ** See below for tips**
1/2 teaspoon vanilla extract (I added 1 full teaspoon of mexican vanilla!)
3 ripe medium/large bananas, mashed
1/2cup + 1/3 cup chopped walnuts (optional)

Preheat the oven to 325 degrees.
Grease a 9x5x3 loaf pan and dust with flour. ** See tips below** Blend together the flour, baking soda and salt and set aside. Mix together the egg, sugar and vegetable oil until combined. Add the flour mixture and when blended add the buttermilk, vanilla and mashed bananas. Mix until combined.
Fold in 1/2 cup of chopped walnuts, if desired, and pour batter into prepared loaf pan. Top batter with remaining 1/3 cup chopped walnuts, if desired.

Bake for 45 - 60 minutes, or until a toothpick inserted in the center comes out clean. Cook for about 10 minutes on a wire rack before removing from pan.

** When it comes to recipes that call for buttermilk, especially only 2 tablespoons, I often don't buy it in the store, I just make some at home. You can do this by using milk and vinegar (I hear lemon juice works too, but I have always used vinegar). Just take a 1/2 cup of milk and add about 1/2 teaspoon or so of vinegar. Stir to combine and let it sit for about 5 minutes before adding to the rest of your ingredients.

** Also, another tip I want to share with you all is how I dust pans when I make bread. Most recipes call for you to dust a pan with flour so it will come out more easily. Try using cinnamon sugar next time you make bread. I do that will all my bread recipes and it adds an additional element of flavor! I also sprinkle a little cinnamon sugar on top of each loaf! It adds a nice crunch to the top, and a sugary cinnamony burst to every bite!

Thursday, August 13, 2009

Baked Shells with Fontina and Parmesan Bread Crumbs

I was a bit under the weather a couple of weeks ago, and wasn't really up for making fancy meals, let alone making anything in my kitchen. My poor kitchen was deprived for several days :o( I had a lot of time to sit/lay around and look at my google reader, as well as search for recipes that I wanted to make when I felt a little better. I came across this total comfort food on Ezra Pound Cake. I knew it would be an easy meal to prepare, I just had to send the hubs to the store to get the ingredients! I often find that sending the hubs to the grocery can be very comical...especially when you are asking for things like "Fontina" cheese!! haha I usually get several phone calls asking all sorts of questions, but I would rather have that happen then him not get the right thing.


Baked Shells with Fontina and Parmesan Bread Crumbs
(from Ezra Pound Cake originally found From Jack Bishop’s “The Complete Italian Vegetarian Cookbook”)


1 pound small shells
5 tablespoons unsalted butter
1 cup heavy cream
8 ounces (about 2 cups) Italian Fontina cheese
Salt (I used Garlic Salt)
Pinch of freshly grated nutmeg
1/3 cup plain bread crumbs
1/4 cup freshly grated Parmigiano-Reggiano
Prepare shells according to package directions, but cook only until they are 1 to 2 minutes shy of al dente. Then drain.


Meanwhile, dice 4 tablespoons of the butter and place in a large bowl. Warm the cream in the microwave, about 1 minute. Cover to keep the cream warm. Shred the Fontina.


Stir the shells into the bowl with the butter. Toss to coat well. Stir in the warm cream and Fontina, and stir until the cheese starts to melt. Season with salt to taste and the nutmeg.


Pour the mixture into a greased 13-by-9 ceramic or glass baking dish. Combine the bread crumbs and Parmigiano-Reggiano, and sprinkle over the pasta. Dice the remaining tablespoon butter, and dot the crumb topping with small pieces of butter.


Bake until the sauce is bubbling and the topping turns golden brown, about 20 minutes. Serve immediately.
This meal was absolutely delicious! I haven't had a macaroni and cheese dish like this before, but I couldn't believe what I was missing out on. I do wish I had decided to cut the recipe in half, as it was MUCH TOO MUCH and after eating leftovers for like 3 nights in a row, I was macaroni and cheesed out! I hope you give it a try...PS - Fontina cheese is delicious!!!

Macaroni and Cheese on Foodista

Tuesday, August 11, 2009

Garlic Crusted Sea Scallops

I was clipping coupons about a month ago and came across a coupon for Sea Scallops. Kroger had sent me the coupon for their brand of Scallops (the frozen ones). So I clipped it and thought I would see how much they were and if it wasn't a bad deal, then I would attempt to cook them myself. I got to the grocery store and low and behold ... they were on sale! I was so excited, but nervous because I haven't ever prepared them. I have watched a lot of people cook them over the years, so I thought I would give it a whirl. Unfortunately I got nervous, so in the freezer they went until I could figure out what I wanted to do with them!
The hubs and I really love garlic, so I knew that would have to be the main ingredient in my Scallops. I was recently watching The Next Food Network Star and Jeffrey Saad prepared them on one of the last few episodes. I liked his method of sauteing them and it didn't seem too difficult. I thought about the Scallops for about a week after seeing that episode, trying to come up with a way to cook them using the tips I had seen and knowing the flavor I wanted. This is what I came up with...
Garlic Crusted Sea Scallops
(from the kitchen of Liesl)

8 - 10 large sea scallops
flour for coating
1 turn of your saucepan of Olive Oil
about a Tablespoon of unsalted butter
salt/pepper to taste
2-3 teaspoons of minced garlic

You are better to buy your scallops fresh, but if you are like me and catch a deal and buy them frozen, defrost them in the refrigerator. Carefully dry scallops with paper towels (the frozen ones will produce a lot of water and they won't get a good crust on them if they aren't dry). Heat oil in a saucepan over medium heat. Add butter to saucepan. While butter is melting, cover each scallops with a good coating of flour (this with give you that nice caramelized crust on the outside), make sure you coat each side.
When you pan is nice and hot (the butter will start to bubble) add scallops. Be careful not to overcrowd your pan otherwise you will end up steaming your scallops...and you don't want that...trust me the crusty coating is the best part! Cook the scallops until each side is browned and the scallop is firm. This won't take very long, so don't walk away!

When your scallops are nicely browned on each side, remove saucepan from the heat and add your garlic, salt and pepper. Let sit to absorb some of the flavors for a few minutes. Carefully remove scallops to your serving dish and spoon some of the garlic sauce from the pan over top of the scallops! YUM!
I served mine with sauteed Zucchini in garlic. It was a perfect side dish to this meal.

I really enjoyed this meal. For my first attempt at making Scallops, I was pretty impressed. Now that I have overcome that "I have never made those before - I am nervous" feeling, I want to try it again but maybe tweak some of these steps. I would love to hear your input and see if you have any better tips for preparing them. There were delicious!

Thursday, August 6, 2009

Spaghetti and Meatballs ... for dessert?!? What!?!

I know I haven't blogged in a while, but I am back with something exciting to share with you! A close friend on mine has a birthday coming up and I really wanted to do something extra special for her. A couple of weeks ago, my husband surprised me after work with a cookbook I have been eyeing for quite awhile now...Hello Cupcake! The designs in this cookbook as so adorable! I practically have the urge to stay in my kitchen until I bake them all! I am so glad my hubs got me this cookbook, he is such a sweetheart! Maybe he bought it for other reasons though!
I decided on making my friend the Spaghetti and Meatball cupcakes, because every time she has spaghetti night at her house, she always brings in leftovers for me to enjoy! I knew right away she would get a huge kick out of these...and maybe drop the hint that I was ready for spaghetti dinner again!! :o)

The cupcakes turned out perfectly, and she absolutely loved them!! They were really easy to make too. If you haven't had the chance to run out and get this book you really should! It is actually very user friendly ... and I am here to announce that most of the recipes call for store bought ingredients (ie - box mix, canned frosting). The book has great ideas in it, and I can't wait to make another creation! The hubs told me last night that I could make him something for his class when he goes back to school...I think that was a hint and the reason he bought the book for me!
Spaghetti and Meatball Cupcakes
10 vanilla cupcakes baked in white paper liners (I actually made 12 and bought a 12 pack of Ferrero Rocher Chocolates)
1 can (16 ounces) vanilla frosting (I ended up almost using 2 cans because I made lots of noodles!)
1/2 teaspoon unsweetened cocoa powder 3 drops yellow food coloring
12 Ferrero Rocher Hazelnut Chocolates, unwrapped
1 cup low-sugar strawberry preserves (low-sugar has the best color)
2 tablespoons grated white chocolate, plus an additional chunk for garnish

Tint the vanilla frosting with the cocoa powder and yellow food coloring and spread a thin layer on top of the cupcakes. Arrange the cupcakes on a serving platter so that they are touching.
Spoon the remaining frosting into a Ziploc bag. Press out the excess air and seal the bag. Snip a Vs-inch corner from the bag. Pipe the frosting all over the cupcakes to make the spaghetti, piling it high and allowing some of the spaghetti to hang over the edges.

Place the hazelnut chocolates and the strawberry preserves in a medium bowl and toss to coat.
Spoon some of the preserves on top of the cupcakes.
Place 1 hazelnut chocolate on each cupcake. Top the cupcakes with the remaining strawberry preserves. Sprinkle with the grated white chocolate. Place the chunk of white chocolate on a separate plate with a small hand grater and bring to the table with the platter of spaghetti.

I wasn't able to do the whole presentation with the extra piece of white chocolate because I had to travel with it all to work. However, I did reserve some extra grated white chocolate because I knew I had to present the cupcakes to her in a special way ... it went something like this:

"Ellie, do you have a second you could come downstairs?"
"What are you up to now Liesl!?!"
"Just come down."
She rounded the corner, and I said, "Table for one?" She laughed.
She then walked in my room and saw the one chair set in front of the plate of 'spaghetti and meatballs'!
"The special for today is Spaghetti and Meatballs! Would you like some cheese on that?", and I then sprinkled some of the extra grated white chocolate on top!
:o) I know I am such a dork, but she really loved it!

I hope you enjoyed my little story, and hey you got a great recipe idea out of it! Now get to the kitchen and make dinner...no wait dessert! :o)
A HUGE thank you goes out to another great friend of mine, Kristen, she brought her camera in to take pictures for me. She is a great photographer, and has a blog too...you should check it out!